
How to Install Your New Smart Fireplace: A Simple Guide
A concise SXKT smart ethanol fireplace installation guide covering cutout dimensions, KT1500 and KT1600 electrical input, bottom ventilation, overhead clearance and lift-out access.
- Author
- Liang Ethan
- Technical lead
- Liang ZhengXiangAll models
- Published and reviewed
On this page
SXKT smart ethanol fireplace installation
Prepare the correct opening, a level non-combustible support, bottom ventilation and an accessible power connection. Check overhead clearance and keep the fireplace removable.
For SXKT fireplace installation, follow the five steps below and the instructions supplied with your model.
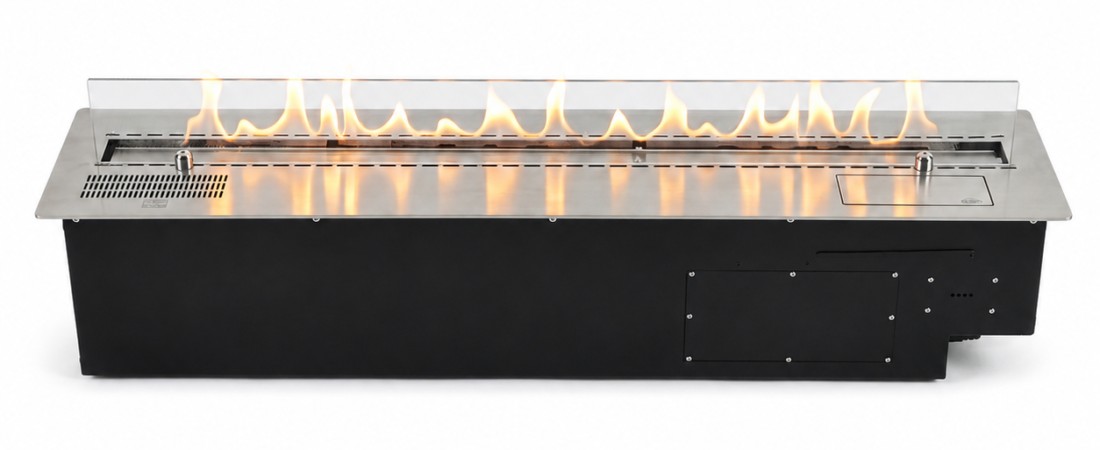
1. Check the installation opening
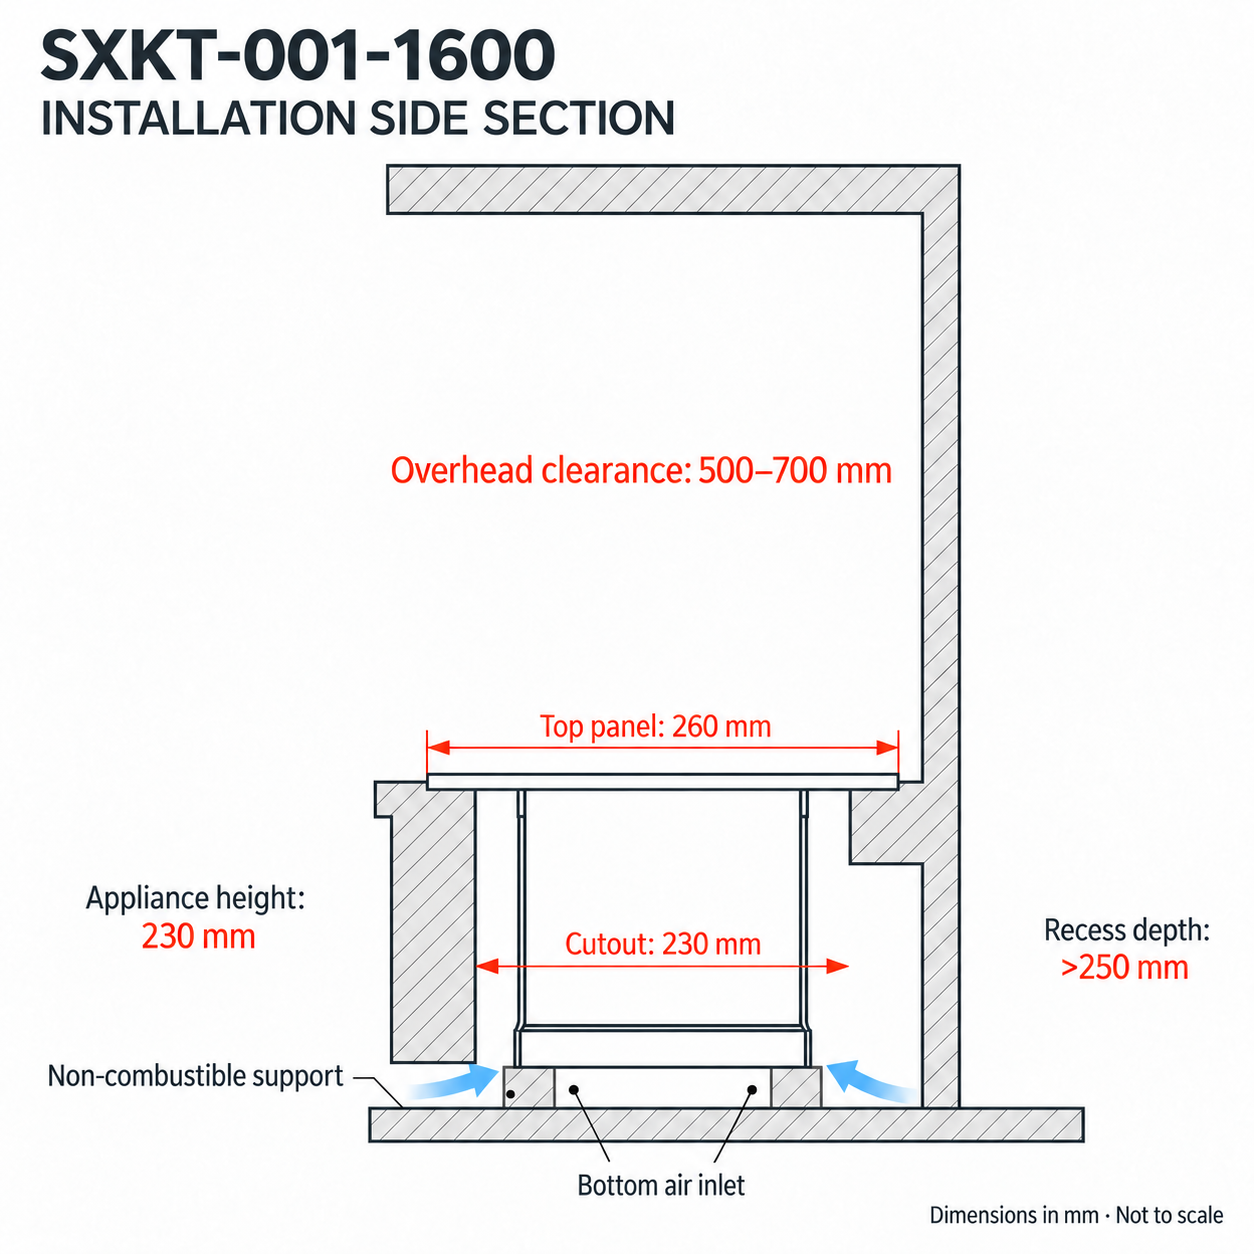
The usual cutout rule is (top-panel length − 30 mm) × (top-panel width − 30 mm), with recess depth greater than 250 mm. Subtract 30 mm from each overall dimension, not from each edge. For custom sizes, use the matching installation drawing.
Scroll across the table to see all columns.
| Item | KT1500 | SXKT-001-1600 |
|---|---|---|
| Appliance L × W × H | 1500 × 260 × 230 mm | 1600 × 260 × 230 mm |
| Cutout L × W | 1470 × 230 mm | 1570 × 230 mm |
| Recess depth | Greater than 250 mm | Greater than 250 mm |
| Electrical input, min–max | 600–1550 W | 700–1650 W |
The top panel overlaps the cutout. Check the fit before fabrication.
2. Provide support and bottom ventilation
Build a stable, load-bearing, non-combustible platform using suitable stone, steel or brickwork. Support the body from below; do not hang a long fireplace solely from its top panel.
Provide a lower or bottom air inlet connected to the space beneath the appliance. The nominal opening-area reference is 300 × 20 mm per metre of fireplace length—60 cm² per metre, or 96 cm² for a 1.6 m unit. This is an area reference, not a fixed slot shape; check the grille’s free area separately.

Keep the inlet and the panel’s cooling holes clear of insulation, stone backing and debris. These openings support internal cooling and combustion airflow; they do not replace room ventilation. See the SXRX and SXKT bottom-air-inlet guide for more examples.
3. Plan the electrical supply
KT1500 uses 600–1550 W; SXKT-001-1600 uses 700–1650 W of electrical input. These ranges are not combustion heat output. Do not size the supply for the minimum power alone.
Provide a 220–240 V AC supply and keep the right-hand power connection accessible. Have a qualified electrician confirm the actual rating label, wiring, protection and earthing. Keep isolation safely accessible and protect cables from heat, drips and pinching.
4. Check overhead clearance and TV-wall protection
Provide 500–700 mm of vertical clearance between the fireplace’s top panel and the overhead surface. Keep this gap unobstructed.
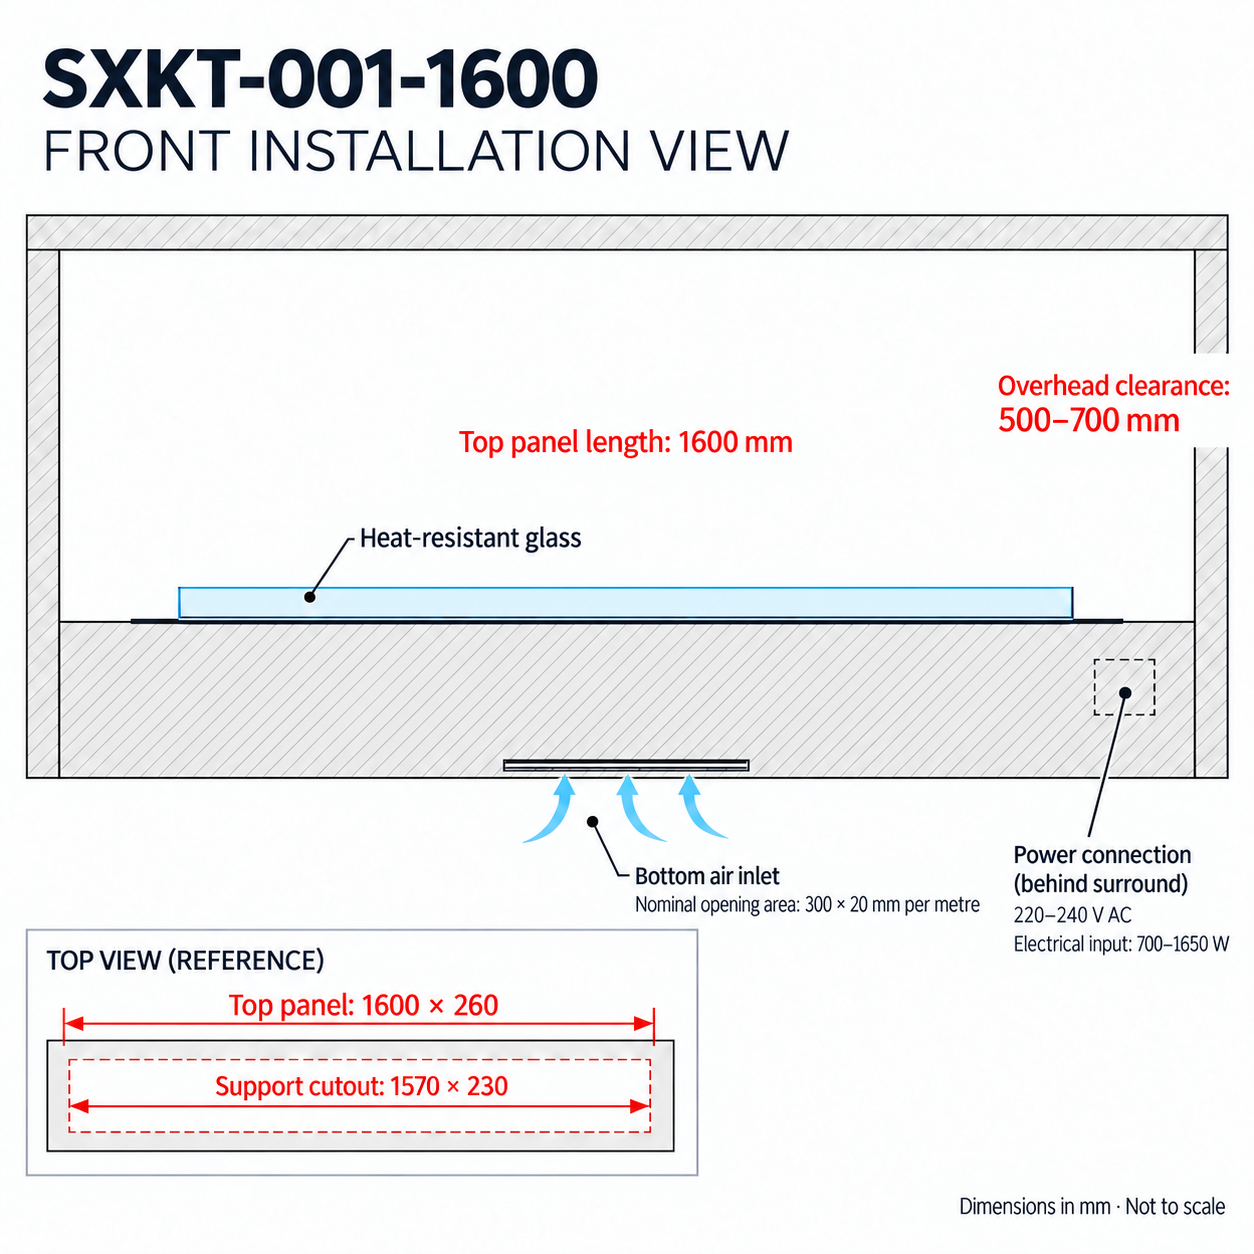
For this TV-wall arrangement, fit 100 mm-thick insulating ceramic wool inside the decorative panel below the television, with heat-resistant, difficult-to-ignite finishes. Insulation does not reduce the required clearance or permit flame contact with the surround.
Check the wall assembly and the TV manufacturer’s requirements with the installer. Keep combustible decoration outside the 500 mm zone around the platform, and do not suspend combustible items within 3 m above the panel.

5. Keep the fireplace removable and commission it
No separate inspection hatch is needed for the embedded lift-out arrangement. Keep a clear upward removal path and safely disconnectable connections; do not permanently seal the unit into the surround.
With the fireplace cool, fuel removed as required and power isolated, use the supplied installation handles and enough people to lower it evenly into place. Check level lengthways and crossways, firm bottom support and unpinched cables. Do not lift by cables or pipes.
Before first use, have the installer check ventilation, supply and the completed enclosure. Follow the manual for filling, starting and stopping, and demonstrate these controls during handover. Never add fuel to a burning or hot appliance.
Ready to plan your SXKT installation?
Send the model, opening dimensions and wall section to SXFireplace before building the surround.
Use the installation planning guide to assemble the wider site and supply information before construction.